To access alert rules, go to Settings >> Knowledge Base from the navigation bar and click Alert Rules. Here, you can choose to view the alert rules in either Tabular View or Coverage View.

Alert Rules
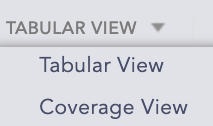
Alert Rules View Dropdown
This is the default view for alert rules where you can see all the active alert rules with their Log Source, Attack Category, and Attack Tag in a table. The Name column also includes a tag that indicates whether the alert is active or inactive. You can display all alert rules under All Rules, My Rules, Used Rules, Vendor Rules, Shared Rules, and Transferred Rules in one place.
For example, in the image below, alert rule LP_ZxShell Malware Detected helps to identify T1059 - Command and Scripting Interpreter and T1218.011 - Rundll32 technique under Execution and Defense Evasion Category. It is currently inactive as it does not have Active tag under its Name.
You can also use Actions to either use, clone, activate, deactivate, delete, set notifications, or get more details about the alert rule.
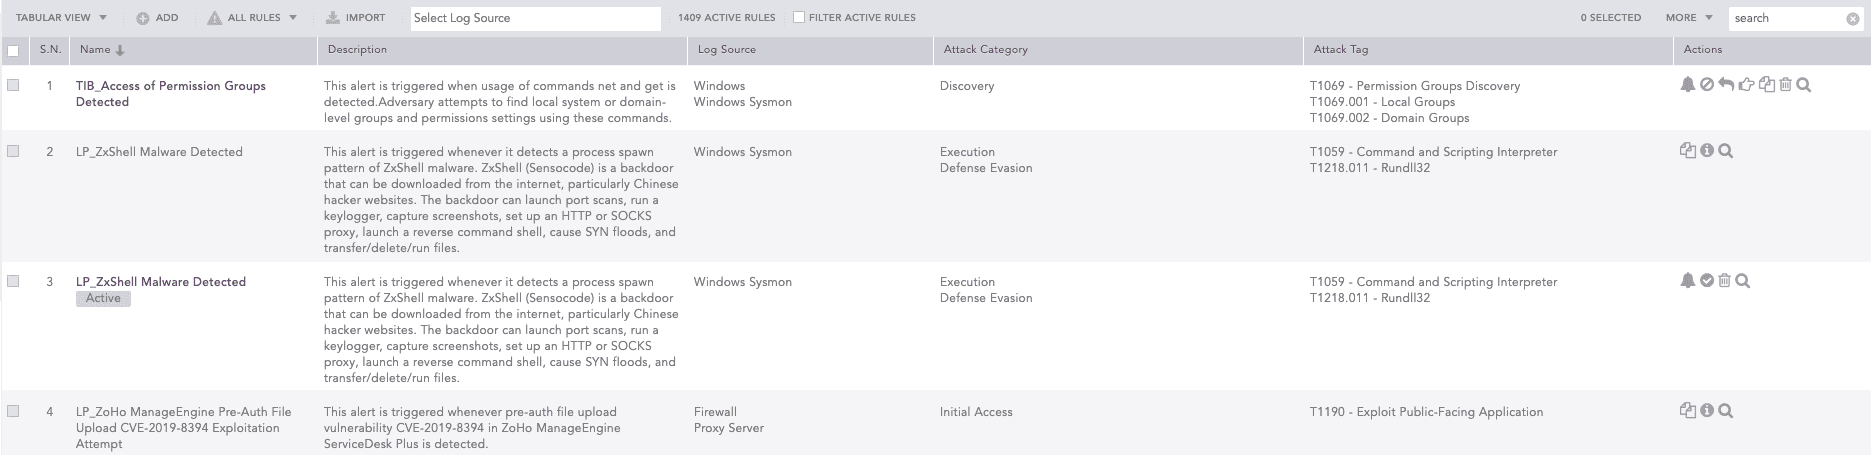
Tabular View of Alert Rules
To sort the columns in ascending or descending order, move your cursor to the column you want to sort. Click the Down Arrow ( ) for ascending order and the Up Arrow (
 ) for descending order.
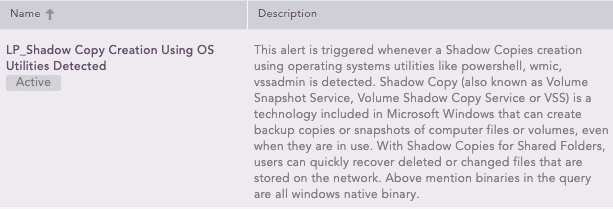
Sort Columns
For each alert rule, you can perform various actions, such as setting up notifications, activating or deactivating, sharing, transferring, cloning, deleting, and searching.
To set up alert notifications, click the Setup Notification ( ) icon of the corresponding alert rule. The solid bell icon (
 ) under Actions indicates notification-enabled alert rules, while the outline bell icon () indicates notification-disabled alert rules. The SETUP NOTIFICATIONS lets you configure the alert notification for Email Notification, SNMP Notification, HTTP Notification, SMS Notification and SSH Notification. To configure the alert notifications, go to Setting Up Alert Notifications.
Go to Settings >> Knowledge Base from the navigation bar and click Alert Rules.
Click the Activate alert rule ( ) icon under Actions.
To activate multiple alert rules, select the alert rules. Click the MORE dropdown and select Activate Selected Alert Rules.
To activate all the alert rules, click Select All. Click the MORE dropdown and select Activate All Alert Rules.
You can De-activate the alert rules using the same method.
You can share alert rules with different users and give them read, edit, or full permissions. Incidents for each shared user and owner are triggered independently.
Go to Settings >> Knowledge Base from the navigation bar and click Alert Rules.
Select My Rules from the dropdown.
Click the Share/Unshare to Other Users ( ) icon under Actions for the alert rule. The Unshared. Click to Share (
 ) icon appears if you have not shared the alert rule previously.
To share multiple alert rules, select the alert rules. Click the MORE dropdown and select Share Selected Alert Rules With Users.
To share all the alert rules, click Select All. Go to the MORE dropdown and select Share All Alert Rules With Users.
Select a User Group. All the users in the user group are listed in the dropdown.
Select Read, Edit, or Full permissions for the users. The read permission allows a user to use and clone the alert rules; the edit permission allows a user to use, clone, and edit the alert rules; and the full permission allows a user to use, clone, edit, remove, and share the alert rules.
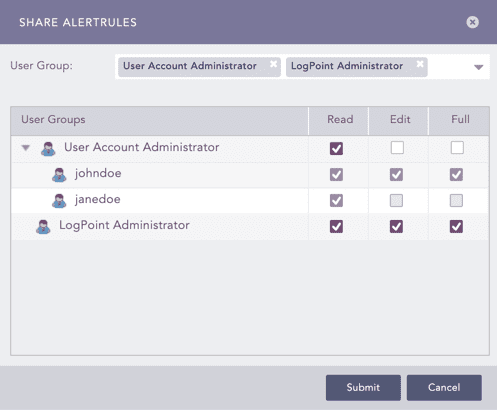
Selecting Permissions for Users
Click Submit
You can unshare alert rules with the users using the same method.
Using Shared Alert Rules
If a user does not have access to a repo used in a shared alert rule, the incident is triggered from other selected repos. If only one repo is selected in the shared alert rule, and the user does not have access to the repo, the incident is not triggered.
Go to Settings >> Knowledge Base from the navigation bar and click Alert Rules.
Select Shared Rules from the dropdown.
Click the Use icon under Actions.
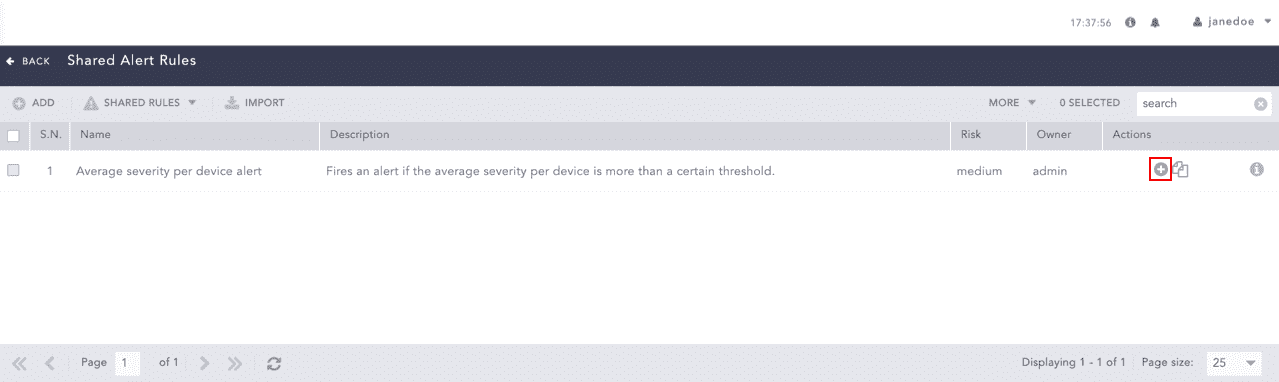
Using a Shared Alert Rule
To use multiple alert rules, select the alert rules. Click the MORE dropdown and select Use Selected Alert Rules.
To use all the alert rules, go to the MORE dropdown and select Use All Alert Rules.
Cloning Shared Alert Rules
Go to Settings >> Knowledge Base from the navigation bar and click Alert Rules.
Select Shared Rules from the dropdown.
Click the Clone ( ) icon under Actions.
To clone multiple alert rules, select the alert rules. Click the More dropdown and select Clone Selected Alert Rules.
To use all the alert rules, go to the More dropdown and select Clone All Alert Rules.
Enter a new Name for the cloned rule.
Select the Replace Existing? checkbox to replace an existing rule with the same name.
Click Clone.
You can transfer alert rule ownership from one user to another. It is important to transfer alert rule ownership when a user who owns alert rules needs to be deleted. This is also relevant when a user becomes part of a different User Group and no longer needs to own the same alert rules.
To transfer the ownership of Alert Rules:
Go to Settings >> Knowledge Base from the navigation bar and click Alert Rules.
Click My Rules from the dropdown next to +Add.
Click the right hand pointer icon ( ) under the Actions column of the alert rule.
To transfer ownership of multiple alert rules, select them. Click the MORE dropdown and select Transfer Ownership of Selected Rules.
To transfer ownership of all alert rules, click Select. Click the MORE dropdown and All select Transfer Ownership of All Rules.
Select a User from the dropdown.
Click OK.
To view transferred alert rules, go to Settings >> Knowledge Base >> Alert Rules. Click Used Rules from the dropdown and go to Transferred Rules.
Transfer Ownership When Deleting Shared Alert Rule’s Owner
When you delete a user who has shared alert rules you must delete the shared alert rule or transfer the alert rule’s ownership to another user.
Go to Settings >> User Accounts from the navigation bar and click Users.
De-activate the user by clicking the De-Activate User icon under Actions.
Click Manage De-Activated Users.
Click the Delete icon under Actions.
Click Yes.
To transfer the ownership, select a user from the list of active users in the dropdown and click Submit.
To delete the user and user’s alert rule without transferring their ownership, click Delete.
Go to Settings >> Knowledge Base from the navigation bar and click Alert Rules.
Click the Clone Alert Rule () icon under Actions for the rule.
To clone multiple alert rules, select the alert rules. Click the MORE dropdown and select Clone Selected Alert Rules.
To clone all the alert rules, click Select All. Go to the MORE dropdown and select Clone All Alert Rules.
Enter a new Name for the cloned rule.
Check the Replace Existing? checkbox to replace an existing rule with the same name.
Click Clone.
Go to Settings >> Knowledge Base from the navigation bar and click Alert Rules.
Click the Delete icon ( ) under Actions for the rule.
To delete multiple alert rules, select the alert rules. Click the MORE dropdown and select Delete Selected Alert Rules.
To delete all the alert rules, click Select All. Go to the MORE dropdown and select Delete All Alert Rules.
Click Yes.
You can search the query used in the alert rule. It redirects you to the Logpoint search with the query, repo, and time-range auto-filled in the search.
Go to Settings >> Knowledge Base from the navigation bar and click Alert Rules.
Click the Search icon ( ) under Actions for the rule.
You will be redirected to the search page in new tab.

Search page with query used in an Alert Rule
You can use COVERAGE VIEW to display the categorization of the alert rules based on attack categories and the attack technique of the MITRE attack framework. It is useful to know which alert rules are used to protect from which MITRE attack category.
For example, in the image below, you can see which alert rule is active to protect from Phishing attacks under the Initial Access category. You can drill down each category and technique to see all the alert rules that can detect that specific attack technique. You can also activate the alert rule if it is not active.
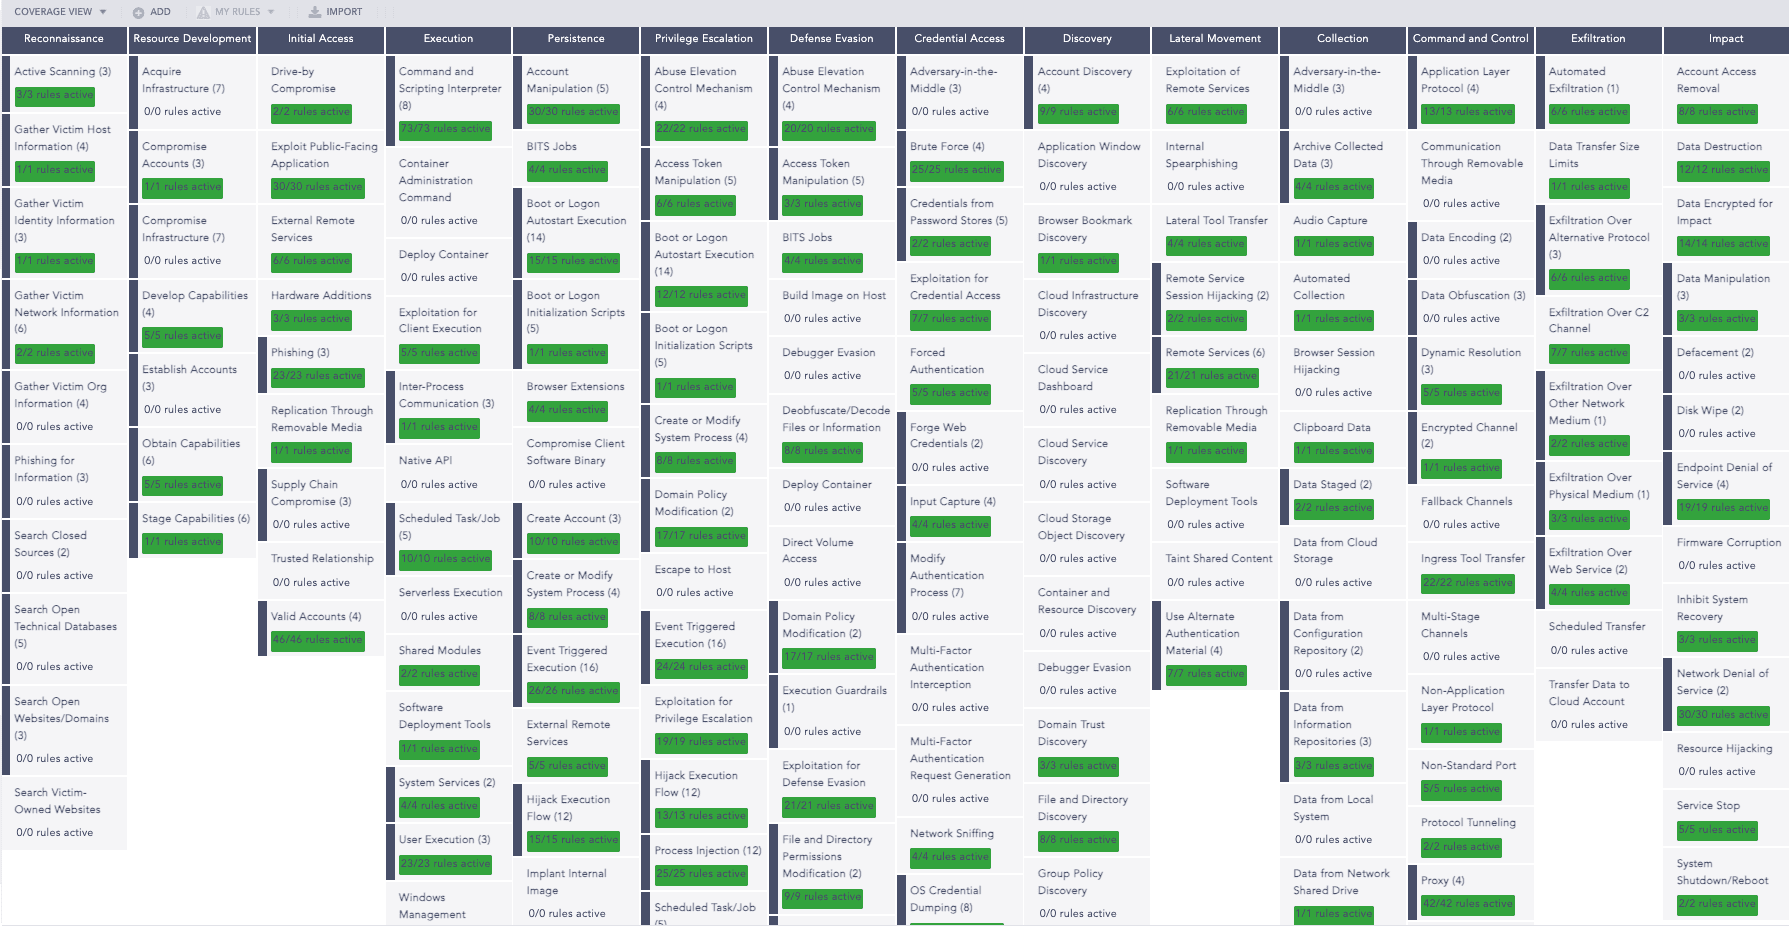
Coverage View of Alert Rules
You can click the attack technique to view the list of its corresponding alert rules. Use this view to see the ratio between the total number of active alert rules compared with the total number of alert rules. The fraction is highlighted in green.
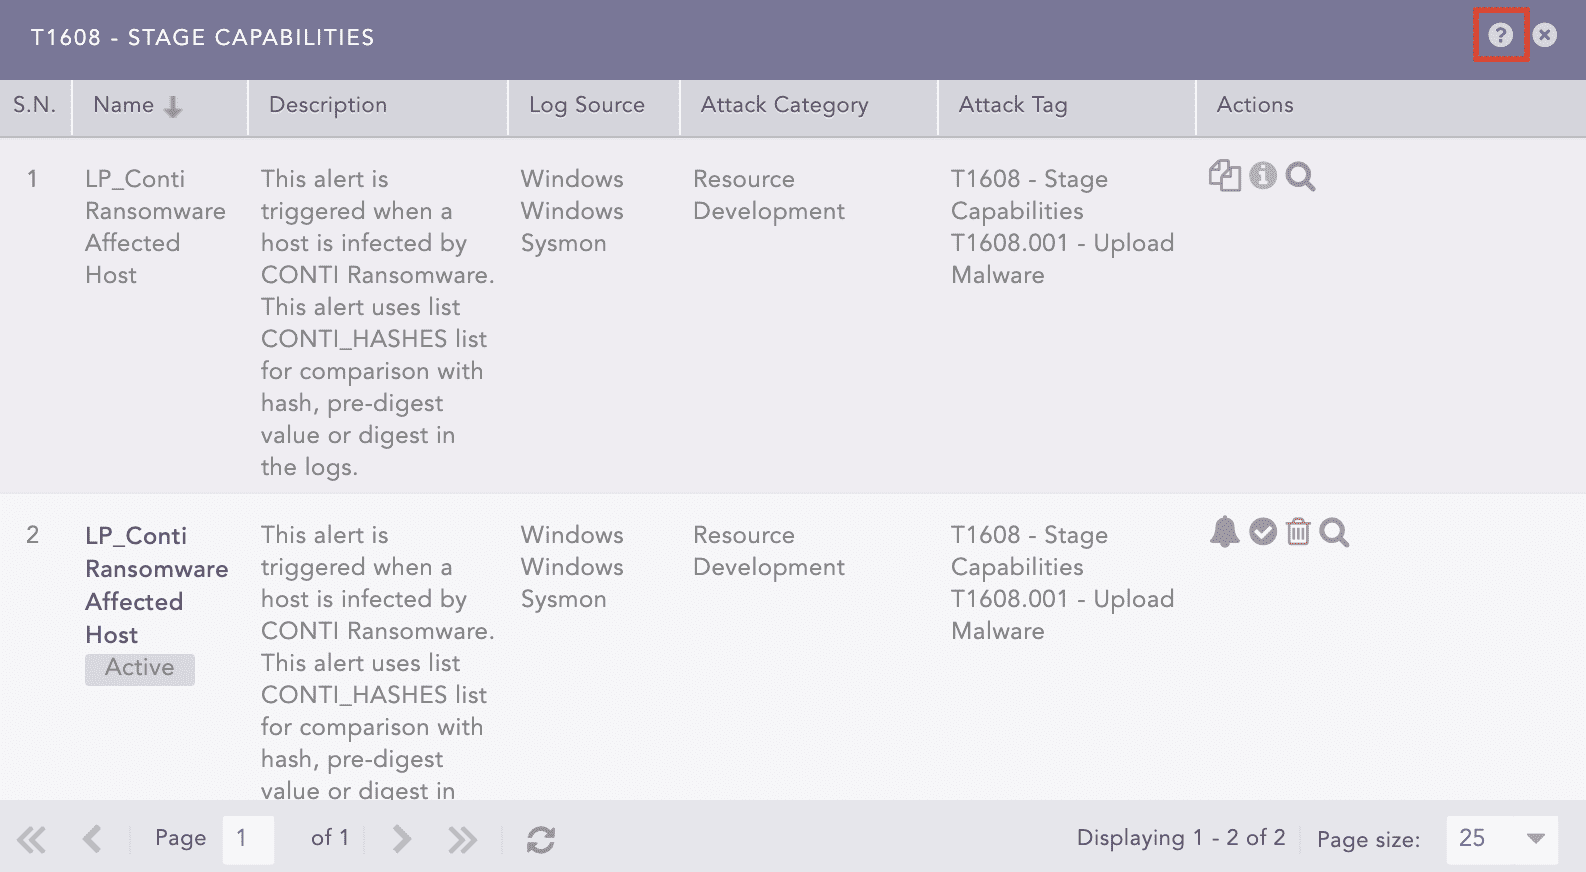
List of Alert Rules Associated with the Attack Tag
Click the help ( ) icon to view the description of the attack tag associated with the attack techniques and sub-techniques of the MITRE attack framework.
Description of the Attack Tag
Both the tabular and coverage views include an action bar you can use to:
Allows you to create a new alert rule using the alert creation wizard. Go to Creating an Alert Rule for more details.
It allows you to import alert rules from the stored location. While importing alert rules, only the repos from the alert rules exported from Lopoint are selected.
Go to Settings >> Knowledge Base from the navigation bar and click Alert Rules.
Click IMPORT.
Browse to the Alert Rules. You can only import alert rules exported from Logpoint with .pak extension.
Click Submit.
You can only export alert ruled from tabular view. The exported alert rules .pak file also contains the repo configuration of the alert rules. To export alert rules:
Go to Settings >> Knowledge Base from the navigation bar and click Alert Rules.
Select My Rules from the dropdown and select the alert rules that you want to export.
Click EXPORT.
Allows you to view only the active alert rules by selecting the checkbox. This checkbox is only available for tabular view. It is selected by default.
Allows you to filter the alert rules according to the log sources using the dropdown. The dropdown is only available for tabular view.
In TABULAR VIEW, use the MORE dropdown at the top-right corner to:

MORE
Activate Selected Alert Rules lets you activate multiple alert rules at once.
Deactivate Selected Alert Rules lets you deactivate multiple alert rules at once.
Setup Notifications of Selected Alert Rules lets you configure alert notification for multiple alerts at once. Refer to Setting Up Alert Notifications for more details.
Columns lets you filter if you want to display Attack Category and Attack Tag in the UI.